

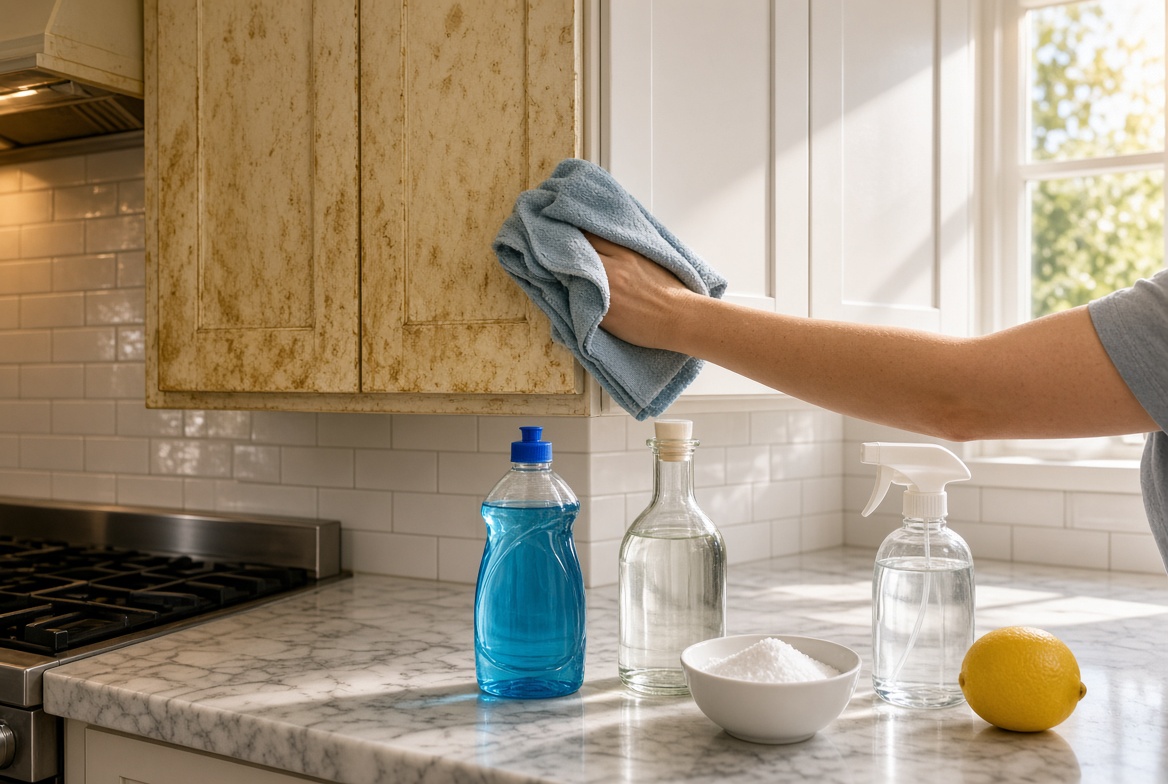
You do not need a commercial degreaser first. Start with this kit:
Grease-cutting dish soap (Dawn Original or Dawn Ultra is the most consistently effective)
Distilled white vinegar
Baking soda
Warm (not boiling) water
2–3 microfiber cloths (one for cleaning, one for rinsing, one for drying)
Soft sponge or non-scratch pad
Old soft toothbrush for hinges, handles, and grooves
Spray bottle
Optional: washing soda (sodium carbonate) for heavy buildup
Optional: Murphy Oil Soap for finished wood after degreasing
Optional: cotton swabs for hardware edges
Always spot-test on the inside edge of a door. Painted cabinets, high-gloss finishes, and some wood stains can dull if you use undiluted vinegar or abrasive paste.
The Best DIY Method
This is the method that wins most real-world tests: warm dish soap first, vinegar for the film that remains, and baking soda paste only on stubborn spots.
Step 1: Dry dust first
Wipe loose dust and crumbs with a dry microfiber cloth. If you wet a dusty door, you smear grit and can scratch the finish.
Step 2: Mix the primary degreaser
In a bowl, mix 2 cups warm water with 1 teaspoon grease-cutting dish soap. You want light suds, not a thick bubble bath. Too much soap leaves residue that attracts more grease.
Wring a microfiber cloth until it is damp, not dripping. Excess water is the enemy of wood and particleboard cabinets. It swells edges, lifts veneer, and can send you toward cabinet repair or replacement.
Step 3: Work in small sections, top to bottom
Wipe one door or one panel at a time. Let the soapy cloth sit on the greasiest band (usually 24–36 inches above the cooktop) for 30–60 seconds so the surfactant can break the oil.
Wipe with the grain on wood. Don’t grind in circles on stained wood or you push residue into the grain.
Step 4: Rinse residue
Use a second cloth dampened with clean warm water. Soap film left behind feels sticky and looks dull.
Step 5: Dry immediately
Use a third cloth and dry right away. This single step prevents water spots, swelling, and finish haze.
For many kitchens, you can stop here. If doors still feel tacky, continue.
Upgrade Mix for Moderate Grease
In a spray bottle, mix 1 cup warm water, ½ cup distilled white vinegar, and a few drops of dish soap.
Spray the cloth, not the cabinet, if you have wood, painted, or veneer doors. Misting the door directly lets liquid run into seams and hinge holes.
Let it dwell 2–5 minutes. Wipe. Rinse. Dry.
Vinegar is acidic. Do not use it on natural stone nearby such as marble, limestone, or some quartzite. Protect counters. Use a milder dilution on delicate painted finishes.
Stubborn Spots Recipe
For handles, the strip above the stove, and yellowed corners, mix 2 tablespoons baking soda, 1 tablespoon warm water, and optionally ½ teaspoon dish soap.
Make a thick paste. Apply only to the spot. Wait 5–10 minutes. Gently rub with a soft cloth or toothbrush. Rinse thoroughly. Dry.
Baking soda is mildly abrasive. Do not use it aggressively on high-gloss paint, thermofoil, or soft wood finishes.
A heavier option some people use for severe buildup is 1 tablespoon washing soda, 1 teaspoon Dawn, and 1 cup water. This is more alkaline than baking soda. Spot-test and keep dwell time short, under a minute. Rinse well. Skip this on unknown or damaged finishes.
How to Clean by Cabinet Material
Painted kitchen cabinets: use the mildest mix first, dish soap and water. Avoid Magic Erasers, scouring pads, and strong solvents. They can burnish or strip paint and suddenly you’re shopping kitchen cabinet painting, cabinet refinishing, or painting kitchen cabinets services.
Stained or finished wood: soap and water, then dry. After the grease is gone, a tiny amount of wood-safe oil soap can restore sheen. Don’t soak. Don’t leave vinegar sitting.
Laminate, thermofoil, or vinyl wrap: soap works well. Avoid high heat, steam cleaners on edges, and harsh alkali that can lift the film. If the wrap is already peeling, cleaning won’t save it. That’s when cabinet replacement or refacing becomes the real conversation.
Glass-front or open shelving: clean glass separately with vinegar-water. Don’t let degreaser drip onto dishes.
Hardware, Hinges, and the Greasy Finger Zone
Handles and the area around them collect the worst film.
Spray or wipe the same soap solution. Use a toothbrush around screws and crevices. Use a cotton swab for the tiny ring of gunk under a knob. Dry metal so it doesn’t spot.
If hardware is cheap and crusted, sometimes it’s faster to unscrew knobs, soak them in warm soapy water, and wipe the door separately.
What NOT to Use
Avoid these unless the manufacturer says they’re safe: undiluted bleach or ammonia, oven cleaner, acetone or paint thinner, abrasive powders on gloss paint, steel wool, soaking wood doors in a sink, steam on veneer edges, and Magic Eraser on painted or stained wood without a hidden test.
A ruined finish is how a free DIY job turns into kitchen cabinet contractors, custom kitchen cabinets, or a full kitchen remodel.
How Long Does This Take?
Light film on 10–20 doors: 20–40 minutes.
Heavy stove-adjacent grease: 45–90 minutes.
Whole kitchen including interiors of doors: 1.5–3 hours.
That’s still cheaper than a deep cleaning service, move-out cleaning, or calling kitchen remodeling services because the cabinets “look old.” Often they just look dirty.
When DIY Isn’t Enough
Be honest about condition.
Just grease: DIY.
Grease plus faded paint: clean first, then consider cabinet painting or refinishing.
Peeling thermofoil, swollen particleboard, or broken boxes: cleaning won’t fix structure. That’s cabinet replacement, refacing, or a kitchen renovation.
Home-improvement advertisers pay high rates for terms like kitchen remodel near me, kitchen renovation cost, kitchen cabinets near me, cabinet refacing, and home remodeling contractors because average kitchen jobs run tens of thousands. Cleaning is the cheap test before that decision.
If cabinets are structurally fine, a thorough degrease plus new hardware often looks like a mini-remodel.
