

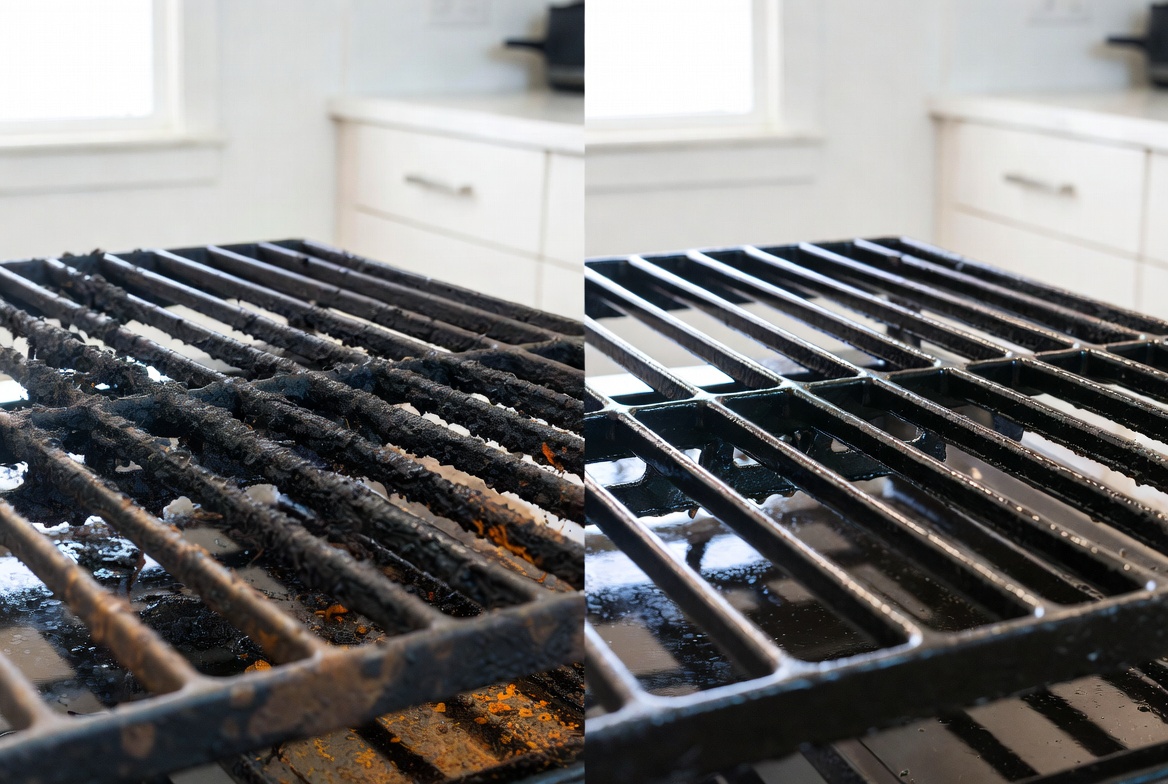
Reviving Cast Iron Stove Grates: From Dull Gray to a Durable Jet-Black Finish
Cast iron stove grates start life with a deep, almost velvety black surface. Years of high heat, spilled sauces, starchy boil-overs, and occasional neglect slowly strip that finish away. What remains is a patchy gray or brown surface that looks tired, feels sticky, and sometimes develops orange rust spots. The good news is that the metal itself is almost indestructible. With the right sequence of cleaning and re-coating, you can rebuild a hard, protective black layer that looks better than many factory finishes and lasts for years.
This process is not complicated, but it rewards patience and precision. Rush the drying step or apply too much oil and you end up with sticky patches instead of a smooth black coating. Follow the steps below carefully and the transformation is reliable.
Understanding Why the Black Disappears
The black color is not paint. It is a thin layer of polymerized oil—cooking fat that has been heated past its smoke point so the molecules break apart and re-bond into a hard, plastic-like film locked onto the iron. Every time you cook, that film takes a little damage. Acidic foods, moisture left on the surface, and abrasive scrubbing slowly wear it down. Once the protective film is gone, the iron reacts with air and water and begins to rust. The gray look you see is mostly exposed metal plus carbonized grease.
Restoring the grates therefore has two clear goals:
- Remove every trace of old grease, carbon, and rust.
- Rebuild multiple thin layers of polymerized oil.
Tools and Supplies Worth Having Ready
- Grease-cutting dish soap
- Nylon scrub brush or non-scratch pad
- Baking soda
- Household ammonia (for heavy buildup only)
- High-smoke-point oil — grapeseed is ideal; canola or refined avocado oil also work well
- Clean paper towels or lint-free cloths
- Steel wool (0000 grade) only if rust is present
- Heavy-duty plastic bags
- Baking sheet lined with foil
Avoid metal scouring pads except for active rust, and never leave bare cast iron wet for more than a few minutes.
Step-by-Step Cleaning Approaches
Light maintenance (weekly or after messy cooking)
Cool the grates completely. Fill a sink with hot water and a good squirt of dish soap. Submerge for no more than 8–10 minutes if the grates are uncoated. Scrub with a nylon brush, rinse under hot water, and dry immediately with a towel until no moisture remains. Wipe a whisper-thin film of oil over the surface and return the grates to the stove. This simple routine prevents most future problems.
Moderate buildup
Mix three parts baking soda with one part water into a thick paste. Coat every surface of the cool grates and let the paste sit 20–30 minutes. The mild alkalinity softens grease while the fine grit lifts residue without scratching. Scrub, rinse thoroughly, and dry at once. Finish with a light oil wipe if the metal looks dull.
Heavy carbonized grease
Place each grate in a heavy plastic bag with roughly ¼ cup of household ammonia. Seal the bag and leave it outdoors or in a well-ventilated space for 12–24 hours. The fumes dissolve the baked-on layer so most of the black residue wipes away with a brush and hot soapy water. Rinse well, dry completely, and move straight to seasoning. Work carefully—ammonia fumes are strong.
Rust spots
Scrub orange areas with 0000 steel wool and hot soapy water until you see clean gray metal. For stubborn patches, a short vinegar soak (equal parts vinegar and water, 20–40 minutes maximum) can help, but watch the time closely and rinse the moment the rust lifts. Any acid exposure strips seasoning, so the grates must be dried and re-seasoned the same day.
Rebuilding the Black Finish: The Seasoning Process
This is the step that actually creates the deep black color and the protective barrier.
- Confirm the grates are bone-dry. Any trapped moisture will create pale spots under the new coating.
- Preheat the oven to 400°F (205°C).
- Pour a small amount of grapeseed or canola oil onto a paper towel and rub a microscopically thin layer over every surface—top, bottom, edges, and the insides of any rings. Then take a fresh paper towel and wipe almost all of it off. The metal should look only slightly shiny, never wet or glossy. Excess oil is the number-one reason seasoning turns sticky.
- Place the grates upside down on a foil-lined baking sheet.
- Bake for 60 minutes. Turn the oven off and leave the grates inside until they cool completely. Slow cooling helps the polymerized layer set firmly.
- Repeat the oil-and-bake cycle two to four more times. Each additional layer darkens the color and strengthens the finish. After three or four coats the surface should look evenly jet black and feel smooth rather than greasy.
Long-Term Habits That Keep the Finish Intact
- Wipe up spills as soon as the grates are cool enough to touch. Sugary and starchy liquids are the fastest way to create new carbonized patches.
- After any wet cleaning of bare iron, dry thoroughly and apply a light oil film before the grates go back on the stove.
- In humid climates, a monthly light re-oil helps more than frequent deep cleaning.
- Avoid dishwashers and self-cleaning oven cycles—both introduce prolonged moisture or extreme heat that damage seasoning.
Common Pitfalls and How to Fix Them
- Sticky or blotchy surface → too much oil was used. Scrub the sticky areas with hot soapy water and a nylon pad, dry, then re-season with thinner coats.
- Gray or white chalky patches → usually mineral deposits from hard water. A baking-soda paste removes them; follow with a fresh seasoning layer.
- Uneven color after one coat → normal. Additional thin layers even out the appearance.
- Flash rust appearing overnight → the grates were not fully dry or the oil layer was incomplete. Strip the rust and start the seasoning process again.
When the process is finished correctly, the grates will have a rich, uniform black surface that resists rust, releases food more easily, and looks intentionally cared for rather than neglected. The entire restoration usually takes one afternoon plus a few oven cycles, and the results hold up under daily cooking for a long time if basic maintenance is followed.
This approach focuses on the chemistry of the iron and oil rather than aggressive chemicals, giving a durable finish that improves with use instead of slowly degrading.
